Monday, 31 October 2011

Christmas with Molly Blooms

I purchased four Molly Blooms stamps a couple of weeks ago so thought it was time to get them out of the packaging and use them. My first card has been made with the following:

Red 6x6 card
Piece of (trimmed) 6x6 paper from the Dovecraft Funky Village paper pack
White snowflake wired ribbon
6 punched snowflake's with added adhesive gems
Small piece of red mirror card
Stamped Molly Blooms image coloured in with Promarkers

Sunday, 30 October 2011

Floral Kits

Well these are the last of the Kanban kits - yaay! But not the end of my card kits sadly. It's been a slow day crafting wise, think I need to do something a little more creative than cut, peel and stick! Maybe a spot of stamping and colouring in for grown ups next.


Mini Kit

Only another 3 Kanban kits to go after this one! Note to self - do not buy anymore Kanban kits!!

These Minis were simply decoupaged and then matted and layered onto card stock. (The lovely spotty card stock came in the kit.) As the topper had rounded edges I used my corner punch to round the edges of the card to match.

Rugby Kit

Having used up the Football topper kit earlier this morning, I thought I would also use up the Rugby kit too! Felt I am on the verge of losing my mojo this afternoon - these kits are not the most inspiring for me! (Sincere apologies Kanban ... but you just don't do it for me anymore.)

Football Kit

The first kit of the day has been used up - yaay! I have had this kit for so long and really can't remember why I bought it. I actually found it quite hard to put these cards together as the subject matter did not inspire me at all.

Saturday, 29 October 2011

3 more takes the total to 21

Ok - so these cards are only a bit of cut & stick - no real skill involved at all, but it's a bit more of a kit used up!

I am going to the Craft show at the NEC next weekend and have to use some of my old stash up in order to justify whatever new stuff I purchase from the show.

I want to have used up every card kit in my stash by tomorrow night - so am setting the alarm early as I will have to get up early tomorrow morning to make sure I do!


18 cards in one day!

I am on a mission this weekend to use up as many card kits as I possibly can. I found 9 La Pashe "Nice and Easel in my stash and being the frugal crafter that I am I have managed to make a total of 18 cards from them! Am so pleased with myself!!


Friday, 28 October 2011

A Teatime Challenge

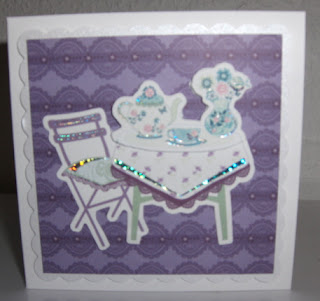
This card has been made as an entry into the Facebook page "Sell Your Crafts Here" weekly challenge.

This weeks theme is "Teatime" (but with all cupcake's being banned!lol ) It has given me an excuse to use up some elements from an old Kanban kit I had lurking under my craft desk!

The more old stuff I use up ... the more new stuff I can justify buying!!!!!

Outside

Inside

Thursday, 27 October 2011

A Butterfly Fest!

I have been on a mission today to use up some of my very old crafting stash, so that I can try and justify all the new crafting stash that I have bought recently - you can never have too much paper in my opinion, lol!

Anyway I came across two partially used sheets of pink butterfly toppers, so I have cut them all out and made a few cards.


Something New from Something Old

Have you ever made a card and not felt completely happy about it? I have! lol
Today I went through my re-work box and pulled out this decoupaged card that I made years ago with the idea of attempting to rescue it!

Before
I have never been happy making A4 cards from kits as I felt they looked a little cheap and nasty - no offence to the manufacturers, just not my cup of tea. So having sat and pondered for ages what to do with this card, I decided to cut the image down and make it into a nice 8 x 8 card.

After
Am a lot happier with the result and think it gives the image a more modern feel.

Wednesday, 26 October 2011

Wow Embossing Powders

Recently had a little play with some WOW embossing powders, something I had only done once before. But I was so tempted by all the gorgeous powder colours I decided to do a bit of an Andy Warhol and use my favourite stamp.
I plan to put all nine of these into one frame and make a bright & cheery picture for my craft room.

Good Luck

I have dipped into the world of non die-cut decoupage for the first time this week and have discovered I really like it!  For my decoupage taster session I chose a "Good Luck" sheet (a bargain at only 25p from Bee Crafty!) which had three lovely images on it.

First of all I carefully cut out all of the images using a pair of small embroidery type scissors.(I took my time as I didn't want to lose a ladybird leg! Then I used 3d foam pads to layer the relevant pieces together. I would have preferred to use silicon glue but I had run out! (Note to self - pick some up next time- lol) Then I chose my card stock and backing paper from my paper stash and set about making the following three cards.


I made three extra ladybirds for this card - just a red card Candi drawn on with a black pen, with a few legs added once they were on the card!


For this one I mounted the brick tag shape onto some cream card stock and added a green satin bow and some card Candi. 


This one was just simply matted and layered onto some green card stock and some green gingham paper.

I was very impressed with both the quality of the decoupage paper and with the number of cards I could make from one 25p sheet of decoupage. I am off to make some more now! Till next time - happy crafting x

Sunday, 16 October 2011

A Very Crafty Sunday

Kaisercraft "Love" front

Kaisercraft "Love" reverse


Kaisercraft "Believe" front
Kaisercarft  "Believe" reverse
These are two of the new Kaisercraft December 25th papers I have been "playing" with today.


And these are three more of the cards I have made - they have a lovely warm traditional feel to them. I hope my relatives are going to love them as much as I have loved making them.

Kaisercraft December 25th Collection


I am having a lovely day today, playing with my new papers from Kaisercraft - the December 25th Collection. These papers are simply stunning, so much so it took ages for me to pluck up the courage to cut into them. (So glad i bought two of each of the sheets - one to use and one to stroke and look at! lol)

This is the first card of the day, just a simple scalloped 6 x 6 white card, that has had the edges distressed with "Bundled Sage" distress ink. I then cut a piece of Kaisercraft paper to fit the card and distressed the edges with the same ink  This piece of paper was also edges with a fine line of Stickles in "Holly".

Whilst the stickles was drying I punched out 3 holly leaves and distressed the edges again with the same distress ink as before and then used an embossing tool to mark some veins on the leaves (just visible on second photo!)

I cut a length of 1.5inch wide wired olive green ribbon and attached that to the paper. I then cut a think strip of matching paper, edges it in "Holly" Stickles and overlayed it on top of the ribbon. The holy leaves were put in place and three red cabochon adhesive gems added.

The final touches were a small olive green bow made out of ribbon and a red Merry Xmas sentiment.

Not a bad effort (if I say so myself) for someone who generally just likes to peel & stick! lol

Saturday, 15 October 2011

Going Even More Crackers

My lovely friends at Bee Crafty in Bidford upon Avon have been kind enough to let me loose on making a few Christmas Cracker samples for the shop. Those of you who have read some of my previous posts will know that I bought a Woodware Crafty Edger at the Bee Crafty Demo day a couple of weeks back. So I decided to test all the new border punch cassettes that I bought and see what I could come up with. Here are pictures of the first five:
All Five

Star 

Diamond

Scalloped Daisy

Heart


Fancy Scroll
The cracker blanks are made by Stix 2 and come in packs of 6. They come with the cracker snaps included but you do need to add your own joke, hat and small gift - I would like to find items of expensive jewellery in mine, but I don't thinlk there is much chance of that! lol

I have really enjoyed making these this evening, they are simple to do yet thoroughly satisfying. 


Thursday, 13 October 2011

Native American Challenge


The theme of this weeks challenge on Sell Your Craft's Here is "Native American". Wasn't sure if I could come up with anything at first but remembered I had some Tilda stamped images lurking in the depths of my craft drawers and was nicely surprised to find this one.

So after colouring in Tilda with my Promarkers I added a bit of adhesive ribbon for the dress trim and headband. I then set about making a log for her to sit on. This was made very simply by forming a tube out of wood effect card stock and filling in the ends with a circle of lighter brown card.

I then cut out a wigwam shape out of Kraft card and added more adhesive ribbon for decoration. I cut out the door and ceiling flaps out of beige card and used a brown Promarker to draw stitching around the edges. I used the same Promarker to colour 4 coffee stirrers and used these as the wigwam poles.

I made a simple 8 x8 easel card out of white card stock and used green card stock to cover the base, I then used a piece of Kanban background card to make the back of the easel. The wigwam was then mounted onto the card and Tilda was positioned in place.

Just a simple fun card to enter into this weeks challenge - hope you like it.

Monday, 10 October 2011

More Florals


Just a few very simple cards made with the floral toppers mentioned in my previous post.Think the first one would make a lovely wedding card!