Thursday 31 July 2014

Mini Tag Swap

This was a partner swap for the CraftyswappersUk FB group

I had to create 2 mini tags,no smaller than 2.5inches and no bigger than 4 inches. The tags could be made with any theme but had to include lace and an image.

Here is what I came up with:


Wednesday 30 July 2014

Red, White and or Blue tags made for the July 14 Craft Hole Swap

The July 14 theme for the Craft Hole Swap was "Red, White and/or Blue Day and I am excited to say that this was my very first international tag swap. As the tags I made were sent to various location in the US, I decided to go a little patriotic and based my tags around the Union Flag, which I embellished with ribbon, flower, perfect pearls, little London-like images and pins all in red white and blue.

Hope the recipients liked them as much as I do!


Saturday 26 July 2014

Altered Note Pad with Pen Holder - Tutorial

Cut 2 pieces of cardboard approx half an inch larger than your note book (all the way around) 

Then cut 1 piece of cardboard the same length as your other 2 but only 1 inch wide
 

Take a piece of 12 x12 good quality paper or cardstock (Bazzil Basics, American Crafts etc) Glue your 3 pieces of card to your cardstock, making sure you leave a gap either side of the central spine piece - this will allow the covers to bend 

Leaving a border of approx 1 inch, trim away the excess 12 x 12 as shown (my cutting wasn't very straight but it doesn't matter as all of this will be hidden,

Trim the corners but don't trim right up to the corner points - leave a gap of approx 1/8th of an inch

Fold/score the edges around your cardboard
 

Then glue or tape the flaps to your cardboard 

Make sure you use plenty of glue or strong red line tape

Carefully fold the front and back covers  


Cut a piece of  paper slightly smaller than your covers, and glue to the inside.A quick tip, glue the paper to the middle spine first, and press firmly into the recesses before gluing the rest to the front and back covers

Cut a piece of paper about 2 and a half times the width of your note book 

Fold the paper so that it wraps neatly around the note book and score each fold
 

Glue flaps in place - forming a sleeve for your note book
 
Slip your note book into the sleeve to check fit
 

Then glue sleeve into place inside the back cover  

It should then look something like this
 

 Cut a strip of paper 2 inches wide by about 6 inches long 

Take your pen and wrap the paper/card around the widest part of the pen to form a tube
 
 Make sure you can easily get your pen in and out, before gluing the end of the tube together

Flatten your tube a little on one side

Glue the flattened side to the spine of your book

Now the really fun part starts - decorate your notebook however you want. 
I've added post it notes to the other side of mine and a small calendar


I've used a simple ribbon tied around the notebook to close it, but you could add ribbons before decorating the cover, and have them glued in place instead

Happy Crafting!

Sunday 20 July 2014

"Father Day" tags made fort the June 14 Craft Hole Swap

The June 14 theme for the Craft Hole Swap was "In Memory of All Dads"

The paper and cardboard embellishments came from Craftwork Cards.


Saturday 19 July 2014

One Sheet Challenge for the Craft Hole

The Friday night mini challenge for the Craft HOle was to make a mini and a mini mini album in three hours

BASIC DIRECTIONS:

Cut a 12”x12” sheet of printed cardstock down to 12”x7.5”
The accordion fold should fan into the INSIDE of your mini.

Put the small piece you cut off aside for later. (this peice will make your mini mini
Place the 12”x 7.5” piece on your score boar and score at: 3.5”, 7.5”, 11”, 11 1/8”, and 11 1/4”
Between the 3.5” and the 7.5” score lines that you already made, score every half inch.
Fold the score lines between the 3.5” and the 7.5” accordion style.

You do not need to fold the other score lines at 11”, 11 1/8” and 11 ¼” yet. Those will be folded later to wrap to the front cover as a closure.

On the OUTSIDE of your album, you will apply double-sided tape or glue to every other fold on the accordion and glue them together, so that your accordion fans toward the INSIDE of your mini.

When you have completed the folding and gluing, you can begin the fun part of filling it with pages and trims and so forth.

Have fun Here is the link to a video showing the making stages:http://youtu.be/GKLcYzBYLpY


Sunday 13 July 2014

TP Tube Slider Card - Tutorial

Flatten a toilet roll and cut in half, so that you end up with two mini tubes


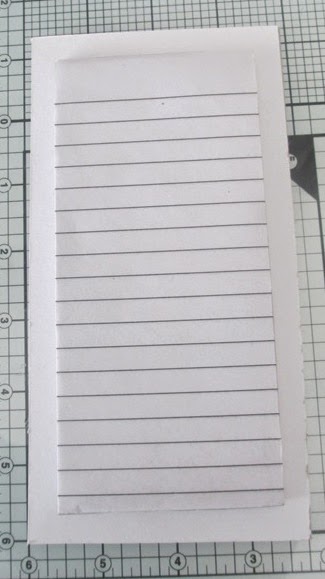
Cut 3 pieces of cardstock, half a cm or 1/4 of an inch narrower (on each side) than your toilet roll 


Leave one piece of card intact, cut one in half, fold the other in half and score half an inch from each end


using the folded piece, glue the large centre section together

using scissors, cut along the lines shown in the photo below

you should end up with the following, you will also need two pieces of seam binding or ribbon 

take your full piece of card and glue your seam binding or ribbon to each side in the middle

take one of your half size pieces of card and the triangular piece of card 

and glue them together 

take your full size card with the seam binding or ribbon on it and glue the half section onto it 

it should then look like this 

take the other half section of card and glue that in place on the opposite side 

this will form a small hinge that will help your card stand up when opened 

at this stage you might want to add a small pocket to the front, I used a MS trellis punch to make mine 

the pocket will enable you to put a small gift card inside, but you could leave the pocket off and add a nice message or stamped image instead - it's entirely up to you 

next, take one half of your tp roll and feed the ribbon/binding and card through it 

make sure that only about half an inch of your centre card is in the tube, then glue your binding to the front

trim off any excess

repeat the same process on the other side 

then slide both side of your tube together, at this stage your binding will stick out 

simply tuck the excess neatly into the ends of the tube

to fold away your card stand simply slide open your card, fold it flat and re-close 

once closed the back should look like this 

and the front should look like this 

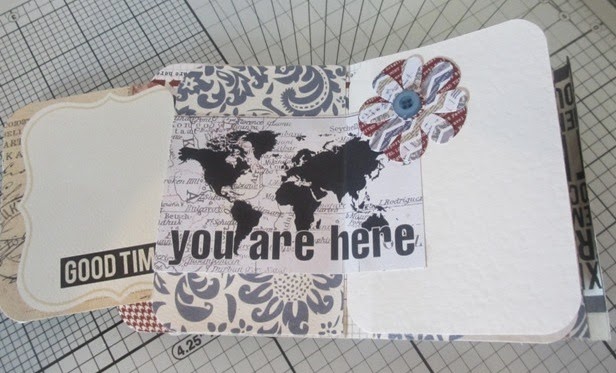
you are then ready to let your imagination run wild! 


Decorate your slider card in whatever style you fancy, using whatever materials and mediums you like. 

Have fun and I look forward to seeing your photos later! xx