Saturday, 11 October 2014

Candy Box Crafts - MDF Suitcase

This is one one of Candy Box Crafts newer products. 

There are only 5 pieces to assemble, but it builds into a very reasonably sized piece, ideal for keeping all those scrappy bits of paper that we all  have lying about the place. 

With Christmas fast approaching its another ideal gift that can be decorated in so many ways.

I have decorated this one in Graphic 45's "Come Away With Me" collection with the addition of a secret ingredient  -  shoe polish.

I gave the 'frames' which surround the suitcases a couple of coats of brown shoe polish . The first coat soaks in pretty well, so after buffing it up I  gave it another coat, a very simple and very effective way of giving that aged leather look.

Hope you like it!


Post It Note Holder Swap

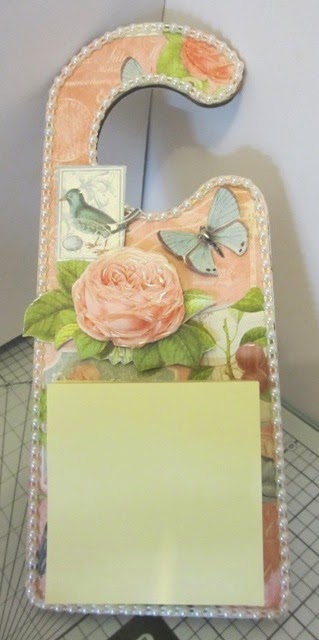
These items were made for a Post-It Note Holder swap in a FB group I belong to. The idea was to make a post it note holder to either : a) go in your handbag, b) sit on your desk or c) to hang up somewhere. Me being me, decided to make all three! Hope my recipient like them. I used the beautiful Botanical Tea Collection  by Graphic 45 to make them. The door hanger is made from MDF by Candy Box Crafts.


Tuesday, 16 September 2014

Kaisercraft Mini Album

I made this album as a small surprise for a friends birthday, I know the papers were from Kaisercraft, but try as I might I can't remember the name of the collection. I must be getting old. Anyway hope you all like it xx


Sunday, 7 September 2014

Graphic 45 - 12 Days of Christmas - Unusual Advent

I am a huge fan of  "The Great British Bake Off", but sadly can not bake at all. While having a sort out of my kitchen cupboards ,I came across an unloved and unused muffin tin. I was going to pop it in a box for the charity shop when I suddenly realised that it had 24 spaces. Hmmm, I thought to myself advent calendars also have 24 spaces ... so with the aid of my trusty circle and scalloped circle punches and a few sheets of Graphic 45's "The Twelve Days of Christmas" left over from last year, a few embellishments and a magnetic sheet... I made this ... hope you like it.


Small punched circle were glued to the inside of the muffin tin


A scalloped circle  of magnetic sheet, keeps the lids in [lace


Tuesday, 2 September 2014

Oh how I love MDF creations by Candy Box Crafts

As many of you already know I am very lucky to be on the Design Team for Candy Box Crafts, and over the past week I have been playing with a few of their creations. One I can't tell you about as yet ... top secret! lol

But one I can share is the "Single Beach Hut", one of the earlier Candy Box Crafts Designs.

I had already turned my beach hut into a sentry box with Graphic 45's The Nutcracker Sweet Collection, but I had always had an idea to decorate it in the style of a garden shed. So with the help of some wood coloured card stock and an embossing folder I re-covered the sides of the shed.

I painted the roof with some Paper Artsy paint and added lots of Memory box die cuts to make grass and foliage. I then added a some miniature clay flowerpots, a watering can,a rake, a few paper roses and a couple of doves and hey presto the transformation from sentry box to garden shed was complete.

Hope you like it!

Before the revamp!
After the re-vamp!


Monday, 1 September 2014

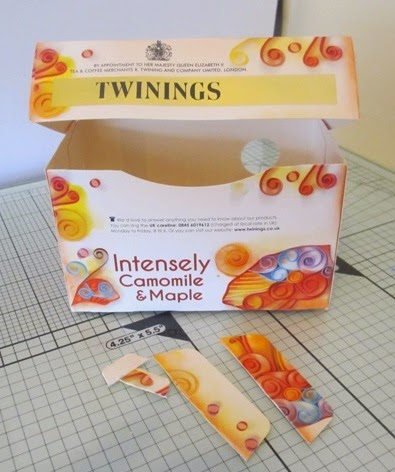
Recycled Tea Bag Box - Prototype

take one empty tea bag box

trim off unwanted falps

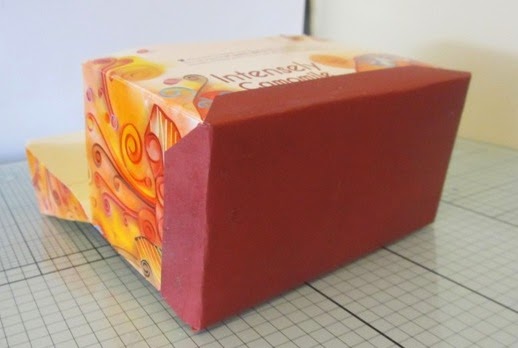
cover bottom with paper or card stock

cover inside and out

punch a decorative border and attach to box

make some dividers and add lined cards for addresses or recipes

Sunday, 24 August 2014

Tussie Mussie - Tutorial

I have put some very simple instructions together for three types of tussie mussie.
 Two made from toilet paper rolls and one from a piece of 6 x 6 card stock.
(NB The ones made from TP rolls will be smaller than the other one) 


Tussie Mussie Type 1 - take your TP roll, flatten at one end and secure with tape or glue.
It will look a bit like an iced jubbly that we used to have as children)


 Tussie Mussie Type 2 - cut your TP roll open and flatten it out a bit.
Then cut a curve as shown in the picture below 

Form into a cone shape and secure with either strong tape/glue
(at this point the open end of your cone will not be level) 

Trim the top of your cone level


Use either a crop-a dile or a hole punch to punch a hole in each side
You can then thread ribbon or twine through to make a handle.

Tussie Mussie Type 3 - For the last option you need a 6 inch square of either card stock or double-sided paper 
(if you use double sided paper it saves time decorating the inside!)

Cut a quarter circle out of your chosen paper or card.
An easy tip to do this is to tie a piece of string to a pen or pencil.
 

Hold the string tight at the bottom left hand corner
Then use the pen/pencil to draw your curved line.
Cut along the line and then form a cone shape as before.
 

You can then have fun letting your imagination go wild and decorating in whatever style you like.
They can be used as wedding favours, trick or treat gifts or hung on Christmas trees as decorations
Or how about making 25 of them as an alternative advent calendar?
Can't wait to see what you all come up with.
Crafty Hugs - Debs xx

Saturday, 9 August 2014

Altered Can/Tin Swap for CraftyswappersUK

The challenge was to use an empty tin/can and decorate it inside and out.

I used two empty tuna tins for mine decorated with G45 papers, some trim and some flowers.

Really pleased with how they turned out.