Cut 2 pieces of cardboard approx half an inch larger than your note book (all the way around)
Then cut 1 piece of cardboard the same length as your other 2 but only 1 inch wide

Take a piece of 12 x12 good quality paper or cardstock (Bazzil Basics, American Crafts etc) Glue your 3 pieces of card to your cardstock, making sure you leave a gap either side of the central spine piece - this will allow the covers to bend

Leaving a border of approx 1 inch, trim away the excess 12 x 12 as shown (my cutting wasn't very straight but it doesn't matter as all of this will be hidden,

Trim the corners but don't trim right up to the corner points - leave a gap of approx 1/8th of an inch

Fold/score the edges around your cardboard

Then glue or tape the flaps to your cardboard

Make sure you use plenty of glue or strong red line tape

Carefully fold the front and back covers


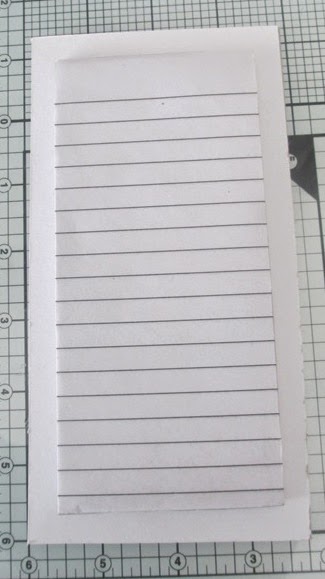
Cut a piece of paper slightly smaller than your covers, and glue to the inside.A quick tip, glue the paper to the middle spine first, and press firmly into the recesses before gluing the rest to the front and back covers

Cut a piece of paper about 2 and a half times the width of your note book

Fold the paper so that it wraps neatly around the note book and score each fold

Glue flaps in place - forming a sleeve for your note book

Slip your note book into the sleeve to check fit

Then glue sleeve into place inside the back cover

It should then look something like this

Cut a strip of paper 2 inches wide by about 6 inches long

Take your pen and wrap the paper/card around the widest part of the pen to form a tube


Make sure you can easily get your pen in and out, before gluing the end of the tube together

Flatten your tube a little on one side

Glue the flattened side to the spine of your book

Now the really fun part starts - decorate your notebook however you want.
I've added post it notes to the other side of mine and a small calendar


I've used a simple ribbon tied around the notebook to close it, but you could add ribbons before decorating the cover, and have them glued in place instead

Happy Crafting!
love it. thanks for taking the time and trouble xx
ReplyDeleteWOW, stunning amount of detailed pic and I LOVE that yellow pattern paper you used. gorgeous.
ReplyDeletethanks Holley, the paper is from the Graphi`c 45 Bohemian Bazzar collection x
DeleteWhat a fantastic tutorial. You are one talented lady. This was great and the outcome gorgeous x
ReplyDeleteLove this! xx Jan
ReplyDeleteFantastic project and pictorial guide. I love it.
ReplyDelete